Monday, June 30, 2014

WIP Flip Flops

Wanted to share my current WIP's (works in progress) today since I don't have anything newly completed. These have been in progress for quite some time, but got overlooked in my painting frenzy.

I picked up some inexpensive flip flops sometime in May with the intent of crocheting embellishments on them. I didn't anticipate how time consuming it would be... Or that I wouldn't find any patterns I liked. After some trial and error (and frustration) I figured out how to crochet around the straps as my foundation row. I've finished one of each so far:


The reddish orange is made with a Lion Brand bamboo cotton yarn. I only crocheted one row of single crochet in addition to the foundation, because any more was looking bulky. Then I found an easy pattern online for a rose and made that to sew on the top. 


For the dark teal flip flop, I used a yarn I picked up a long time ago at a garage sale! I don't know what type of fiber it is, but it's significantly thinner than the bamboo cotton. this meant a lot more stitches in the foundation row, which is why it's taken me so long to just finish one of each. I stitched three double crochets into each foundation stitch to create the ruffle effect. I think they came out so cute!  


As I'm looking at them now, I'm thinking of attaching some kind of heel strap to lessen the flip-floppiness and hold them on. I'll probably try it and see if I like it. But first I need to finish the pairs. 

I have another WIP going that I can't wait to share. I've been working very hard on creating crocheted edgings for the bedroom curtains my mom sewed for me. I'm going to wait and write a whole post about them when they are finished, but here is a preview of the work I'm so proud of: 


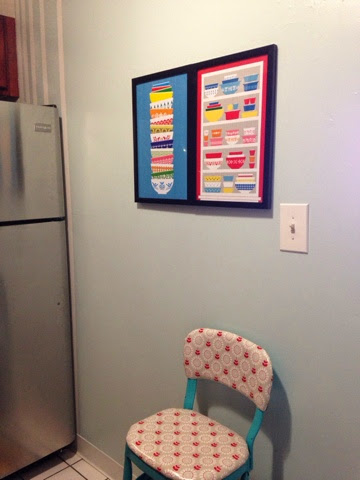
I've been thinking long and hard about how I want to make over my telephone table. And while I'm at it, I'll probably makeover this little guy as well:


This little table is a dough box table. I found an article online which explains that these were used for mixing bread ingredients together and letting the dough rise. Read up - it's pretty interesting! http://www.homethingspast.com/dough-box-kneading-trough/

For this piece I think I've decided to try the Annie Sloan chalk paint I've been hearing about. I found this image on Pinterest of the graphite color after being distressed and coated in wax, and I think this finish would look really nice on the dough box. 


Thoughts?

Now for the telephone table I can't do the same finish, mainly because I just got my black vintage rotary phone, and it wouldn't stand out on a black surface! I'm just not sure what direction to go in. I want the piece to stand out but still coordinate with the room. Olive walls, neutral couch, medium-dark wood furniture, and off white bookshelves... Plus my accessories and decor incorporate beige, burgundy, green, and brown mostly. What would go with this color scheme?? Help! Suggestions most welcome! I'm more concerned about what color to paint the wood than about the upholstery fabric. That will be easy enough to find. 

Seriously, suggestions please. I have a long weekend coming and could get to work if I know what I want to do!

Saturday, June 28, 2014

Saturday Recap - Garage Sales

What an awesome yard sale day! First of all, I got to hang out with some really fun people, which was nice because usually I garage-sale alone. Started off at a sale in Chester that had a bunch of antiques and vintage pieces. I can't believe my luck:


I just wrote this morning that I was looking for a phone for my phone table!! And it's in such good condition!! Now I really gotta start my table. 

Found a few other awesome things too. I got this little round tray which appears to be some kind of souvenir of visiting NJ.. It needs to be cleaned up. I'm not really sure where I will put it but I really liked it:


I picked up this lamp shaped like a spinning wheel for my mom since she is a spinner. It needs to be rewired and it needs a shade. I thought I could fix it all up and save it for a Christmas gift. 


Last thing I got at this sale, I really am not sure what I will do with. But as bunch of former Catholic college girls shopping together, I just couldn't leave this behind!


Yes, that is a Flying Nun lunchbox with matching thermos! It's really dirty, but I'll clean it up. 

After that sale we went straight to a nearby barn sale, which was not a disappointment. The sale was huge - just kind of overcrowded (with people and merchandise.) I found this little Christmas candleholder from PartyLite which matches others that I have (also from garage sales):


I don't think I mentioned a project I've been collecting materials for.. I want to paint a bunch of ornate wooden frames to hang in a grouping on the wall. I had three already, and then found these in the barn sale:


Nice right? They will be tucked away in the closet with the rest until I'm ready for that project. 

All in all, spent $27 on garage sale items today. Well worth it. 

Bathroom & Vintage Pyrex

Guys, this is why I've been absent from blogging for a few days.

Before:
White white white


After:


I've been trying to get this bathroom finished for a few days now and ran into all sorts of problems. I need to do some touch ups because the paint is peeling in places (ugh!!) and my edge lines are much less than perfect. But it's mostly done and I love the color! 

Today we have some serious yard-saling planned for the morning. Going to be on the lookout for some treasures. I've decided to hunt for an old fashioned telephone to use on my old fashioned telephone table. I asked the employees at Somerville Antiques Center if they could estimate what decade my piece is from, and they said the fact it is wood as opposed to chrome indicates 1940's, but the vinyl seat would indicate more the 1950's. They told me to check under the vinyl to see if there is an original fabric, which would confirm 1940's but had just been recovered. Which makes me think, when I recover it maybe I should go over the vinyl instead of removing it - to preserve the history, you know? Still thinking about the colors for it, but I'm pretty sure it's going to go right here after removing the quilt rack and shifting things around:


So to keep in the correct time period as the table, I'm going to look for either one of those old black phones or the fancy French style ones. It would be great if I could actually use it for my landline, we will see what I can find. 

Last night I took a stroll through the Friday night events in Downtown Somerville, and despite my lack of interest in cars, it was pretty cool to see all the classic cars lining Main Street, and the guys standing next to their cars speaking all proudly about them. That's when I wandered into the antique store and asked about the table, and I also went digging for what I look for every time - vintage Pyrex. They have a ton but most of it is either in complete sets or just boring patterns. I've been looking for small individual pieces to use as accents in my kitchen, specifically to match some of the pieces featured in this poster from Pocono Modern:


This was the first piece I found a couple months ago:


Last night I found three more!! I wouldn't have typically purchased all three at once, but it's been so hard to find specifically what I am looking for. 


The last one is not actually on the print, but I've never seen one like it and it was very reasonably priced.

I need to figure out a good way to display them. I was thinking for them to go across the top of my cabinets, but I still need a display method. Maybe small cake stands? 

Have a great Saturday everyone!!


Tuesday, June 24, 2014

Handmade Wall Art

Tonight I dropped my roadside treasure at my parents' house, where it will reside in their garage until I refinish it. Don't judge a book by its cover... It looks rough now, but think of the potential!


Awhile back on Pinterest I was searching for ideas for making large, inexpensive wall art. Something that came up quite a few times was the fabric wall collage. The first one I did right away for my living room:


The second one I completed last night for a wall in my bedroom. Instead of canvases like above, the fabric in this collage was stretched across embroidery hoops. 


I've been collecting the hoops for a couple months from flea markets and garage sales, and a few were given by my mom, who no longer uses them for their actual purpose. Over the weekend I dug through the remnant tables and bins at Fabricland and found all of the fabrics. A few of the remnants are pretty large - up to a yard and a half! - which leaves me a nice amount of fabric for some other future project. All in all, the fabrics cost $13 and I think all together I spent about $7 on the hoops between the different sales. 

To start, I framed the fabric where I most liked the design placement and trimmed the edge to about 1 inch around. 


Using a glue gun, I applied hot glue along the inner rim and glued down all the edges so it would be neat. This is not really necessary if you think you might use those hoops again in the future or might want to change out the fabric seasonally, but I chose to use glue to keep them sturdy. 


I repeated this process on all of the hoops. 


Having tried to hang these in the past and realizing they will fly off the wall (and frighten the cat) if it's particularly windy outside and my windows are open, I tried a different approach. I used a combination of a single nail to hang each one, plus some clear, removable & restickable wall adhesive. I am hoping even when windy, the adhesive will keep them from flying away. 

I thought it would be a good idea to lay out my design arrangement on the bed before starting to hang them, but Lily had other ideas:


After removing the cat I was able to finish hanging the hoops, and I really think it turned out nicely.


A design like this is versatile because I will be able to add on to the collage any time I want to. I'll remain on the hunt for wooden embroidery hoops so when the mood strikes, I'll be ready. 

Monday, June 23, 2014

Shutter Repurposing

I have a good project for you today! I acquired a box of ten small shutters two weeks ago at a yard sale. Actually to be honest, I purchased two of the shutters at the yard sale and then was seriously remorseful that I didn't buy the whole box. I'm a little embarrassed to say I tracked down the homeowner through a friend and retrieved the rest of the shutters the following week. Totally worth it. 

Shutter project #1 used four shutters, which were completely brand new, unfinished wood. The final project was to be two little shelves to hold some of my favorite things. I started off by forming the shelf shape with some Gorilla wood glue and nails, and used some metal corner reinforcements to stabilize them. 


Then I began painting them using a white chalk paint. I have heard so much about chalk paint and really wanted to try it. It's claim to fame is that you don't need to prep your surface before applying the paint, and it's really easy to distress. 


I found a small jar of the chalk paint at Home Depot, and it was barely enough for this project. 


I wound up needing three coats of the paint to get the coverage I wanted. Shutters have a lot of little nooks and crannies, so this wasn't my favorite part of the project. 


Once completed I let them dry overnight. Today I finished this up by attaching hangers to the back and distressing the finish. To distress I just used a coarse sandpaper block to rub away some of the paint, focusing on the edges and corners. I wanted them to look weathered, but still attractive. I'm pretty happy with the final product! 


I was hoping to find some decorative metal brackets to use as support on each side of the shelves, but I had trouble finding something small enough. If I wind up finding them, it will be easy enough to take them down and attach them. 

Still have six more shutters to play with in the future! 

Side note: this morning I found a roadside treasure I am so excited about. I've been on the look-out for a gossip bench/telephone table ever since I saw one in an antique store a few months ago. If you're not familiar with it, a gossip bench is basically a chair and side table combined. Sort of looks like one of those one-armed desks in college lecture halls. Prior to cordless phones and cell phones, the house phone would be stationed at this bench and this is where you would sit to make your phone calls. Most of them have a couple little shelves, which I presume would have been used for a phone book and some note paper and pens. 

The point is, I found one!! I didn't get a good picture of it yet, but I will soon. Right now it's in the back of my car. Aside from desperately needing a paint job and reupholstered seat cushion, it's in really good shape! Didn't see any serious knicks, and everything seems intact. I have to figure out where it will live in my home and then decide on colors.  That's a future post. 

By the way, just want to say thanks for being interested in my blog! I'm really impressed by the number of page views it's gotten within a week. ❤️


Saturday, June 21, 2014

Saturday Recap

Today was not the best garage sale day. I didn't find any good project material, but I did get a few Halloween and Christmas decorations for two bucks a piece!


I spent the rest of the day painting my bedroom. I think it came out really pretty - but I still need to rehang my artwork and finish making my curtains, so before/after photos will have to wait. Instead, here are photos of my living/dining room and kitchen, which I finished painting and decorating last weekend.

Before - the week I moved in:


After:


Paint colors are Glidden Oolong Tea and Dill.

I don't have any before photos of the kitchen, but here it is currently after last week's paint job:


Paint color is Glidden Enamelware. 

I'm really pleased with how cozy my apartment is feeling now!


Friday, June 20, 2014

Garage Sale Hauls

Spring and Summer weekends mean garage sales around here! My routine has been to get up early on Saturday to hunt around for good sales, keeping my eye out for estate sales or things like church rummage sales. Sundays have been spent doing some roadside rescue during my hometown's "bulk collection" period. Bulk collection in a nice little suburb means people put pretty nice stuff out at the curb because they don't want it anymore.  I've scored some great treasures the past few weeks!

This had to have been my best haul so far... 


Everything in this photo was free except for that super large embroidery hoop which was $3.  So far, I cleaned up the barrel piece on the left and use it to store some crochet WIPs. I also scraped off a bunch of chipping paint from the window frame, and I have plans for what I will use it for. The hoop I'm holding onto for a a project I can do once my bedroom is painted, and the frame has been joined by two other ornate frames waiting to be created into something. 

Picked up this basket last week for fifty cents. Not sure what I can use it for, but I feel like it could have some kind of purpose hanging like cubbies. 


I got a box of small shutters at another sale last week. Some are brand new unfinished wood, and a few are painted white. I found some fantastic ideas on Pinterest for projects using shutters, and that's something I'm really looking forward to working on. No photo yet, they are tucked away in a closet. 

I found this dough box end table a couple months back at a school rummage sale in town.  I needed an end table, so this has been utilitarian since I got it home. I definitely plan to revamp this piece, but I'm undecided on paint vs stain, and what colors. I think it could be something really special. Ideas?